To Select and Place a Concrete Base Plate with Grout Cell
- Zoom in so you can get a very close-up view of the base of the column at grid location A1.
-
Select the
 (
Place Object / User Defined Types) tool.
(
Place Object / User Defined Types) tool.
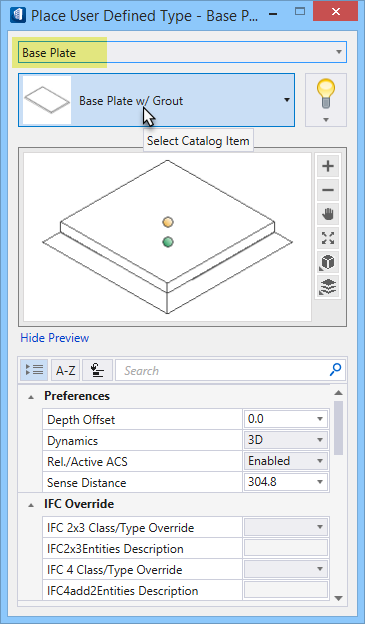
The Place user Defined Type dialog opens.
-
Select the
Base Plate catalog type from the drop down
menu.
A base plate item appears in the preview window, and the catalog item list (located above the preview window) is updated with all the available base plate cells. Select the Base Plate w/ Grout base plate catalog item from this list.
The solid green sphere in the preview window. It represents the placement point for the base plate item.
-
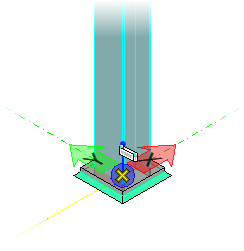
Notice that your pointer is now attached to and ready to place the
base plate. The catalog item’s origin is represented by the location at which
the cell is attached to the pointer — at the top center. Since this cell is
designed to be placed underneath other structural members, the logical place
for the cell origin is at the center of the top surface. Position the pointer
near the bottom of the beam.
The Structural snap icon appears while the
beam is highlighted, immediately confirming that the exact location is
selected. Enter a data point.
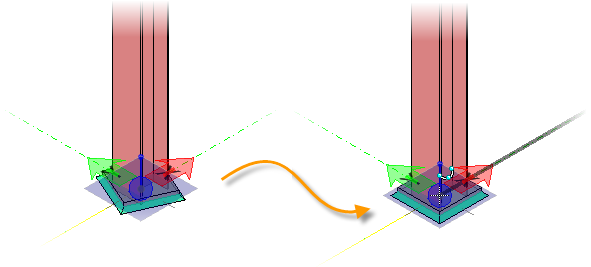
The base plate is attached to the bottom of the beam but its rotation is not yet defined. Lock AccuDraw’s X-axis, move your pointer a bit in the positive X direction, and enter another data point to place the base plate. Click your right mouse button to Reset.